Drip irrigation fittings are available in wide range of types which enable custom design of drip irrigation system to suit your farm needs.
Types of Drip Irrigation Fittings
Primary Connectors: Compression Fittings
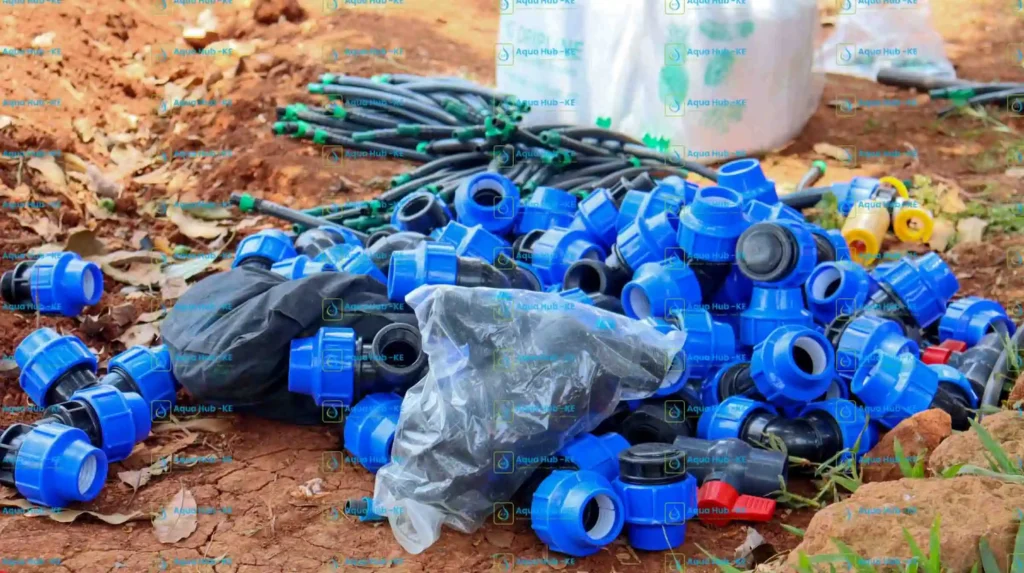
These are the mainline pipe fittings for HDPE connection. Includes:
- Tee connectors – to make a branch line essential for connection of mainline pipe to a sub-mainline connection that feeds a section of farm.
- Elbows – for connection of pipes in corners. Forms 90-degree turn. For making hydrants as well.
- Couplings – straight connectors to connect two pipes of equal diameter. For pipe length extension or replacement of leaking pipes.
- End Caps: for sealing pipe ends on the main or sub-mainline.
Drip End Plugs
- End Plugs: These flexible caps are commonly used on the end of the drip tape laterals. They open easily, allowing the user to flush the line quickly to clear accumulated debris, an important preventative maintenance task. They are essential to the drip kit connection in the field.
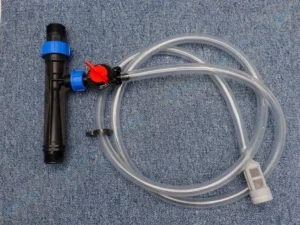
Flow Control: Mini-Valves and Shut-Offs
Controlling the flow of water is essential for managing your irrigation schedule and conserving the water delivered to the crops.
Mini valves are often installed where the driplines connect to the sub-mainline.
These allow you to isolate and shut off water flow to specific beds or crop rows independently. This feature is particularly useful when irrigating different crops with varying water needs or when a section of the field needs repair, ensuring the rest of the irrigation system remains operational.
Making the Drip Kit Connection: Barbed vs. Compression
The reliable connection method to use depends on the type of pipe used on the start connection PVC or flexible HDPE. Understanding the strength of each connection is vital for efficiency in the drip irrigation system.
Barbed Drip Fittings: Simple and Cost-Effective
Barbed fittings are the simplest and most common connection type for smaller diameter, flexible pipes like drip tape and polytube. They feature raised rings (barbs) that push into the inside diameter of the soft tubing, creating a seal through friction and tension.
- Pros: Very affordable, easy to install without specialized tools and suitable for low-pressure, gravity-fed solar systems.
- Cons: Can pull out under high pressure or heat, and the tubing may need to be warming in the sun to ease insertion. These are for driplines to sub-main pipe connection
Compression Drip Fittings: Robust and High-Pressure Ready
Compression fittings are heavy-duty, robust connectors primarily used for joining larger diameter pipes like main and sub-main lines made of thick-walled HDPE. They work by tightening a collar or nut around the pipe, compressing an internal O-ring seal to create a permanent, watertight join.
- Pros: Extremely reliable, capable of handling higher pressure (making them the best polytube fittings for solar irrigation driven by powerful pumps), and do not require glues or solvents.
- Cons: Higher initial cost and can be difficult to remove once installed. If you are learning how to connect drip irrigation pipe to PVC mainline, a threaded compression adapter is often the preferred and most reliable solution.
The Essential Link: Grommets and Take-Off Connectors
A drip kit connection must smoothly supply water from the thick-walled sub-main pipe to the thin-walled lateral drip tape.
- Grommets: These are rubber seals inserted into a punched hole in the sub-main pipe. They provide a watertight gasket.
- Take-Off Connectors: These small fittings have a threaded end that screws into the grommet and a barbed end that connects directly to the drip tape. The integrity of this junction is paramount, as a failure here can result in a major leak and subsequent pressure loss across the entire field.
Assembling Your Drip Irrigation System
Professional drip irrigation installation using drip fittings is as follows:
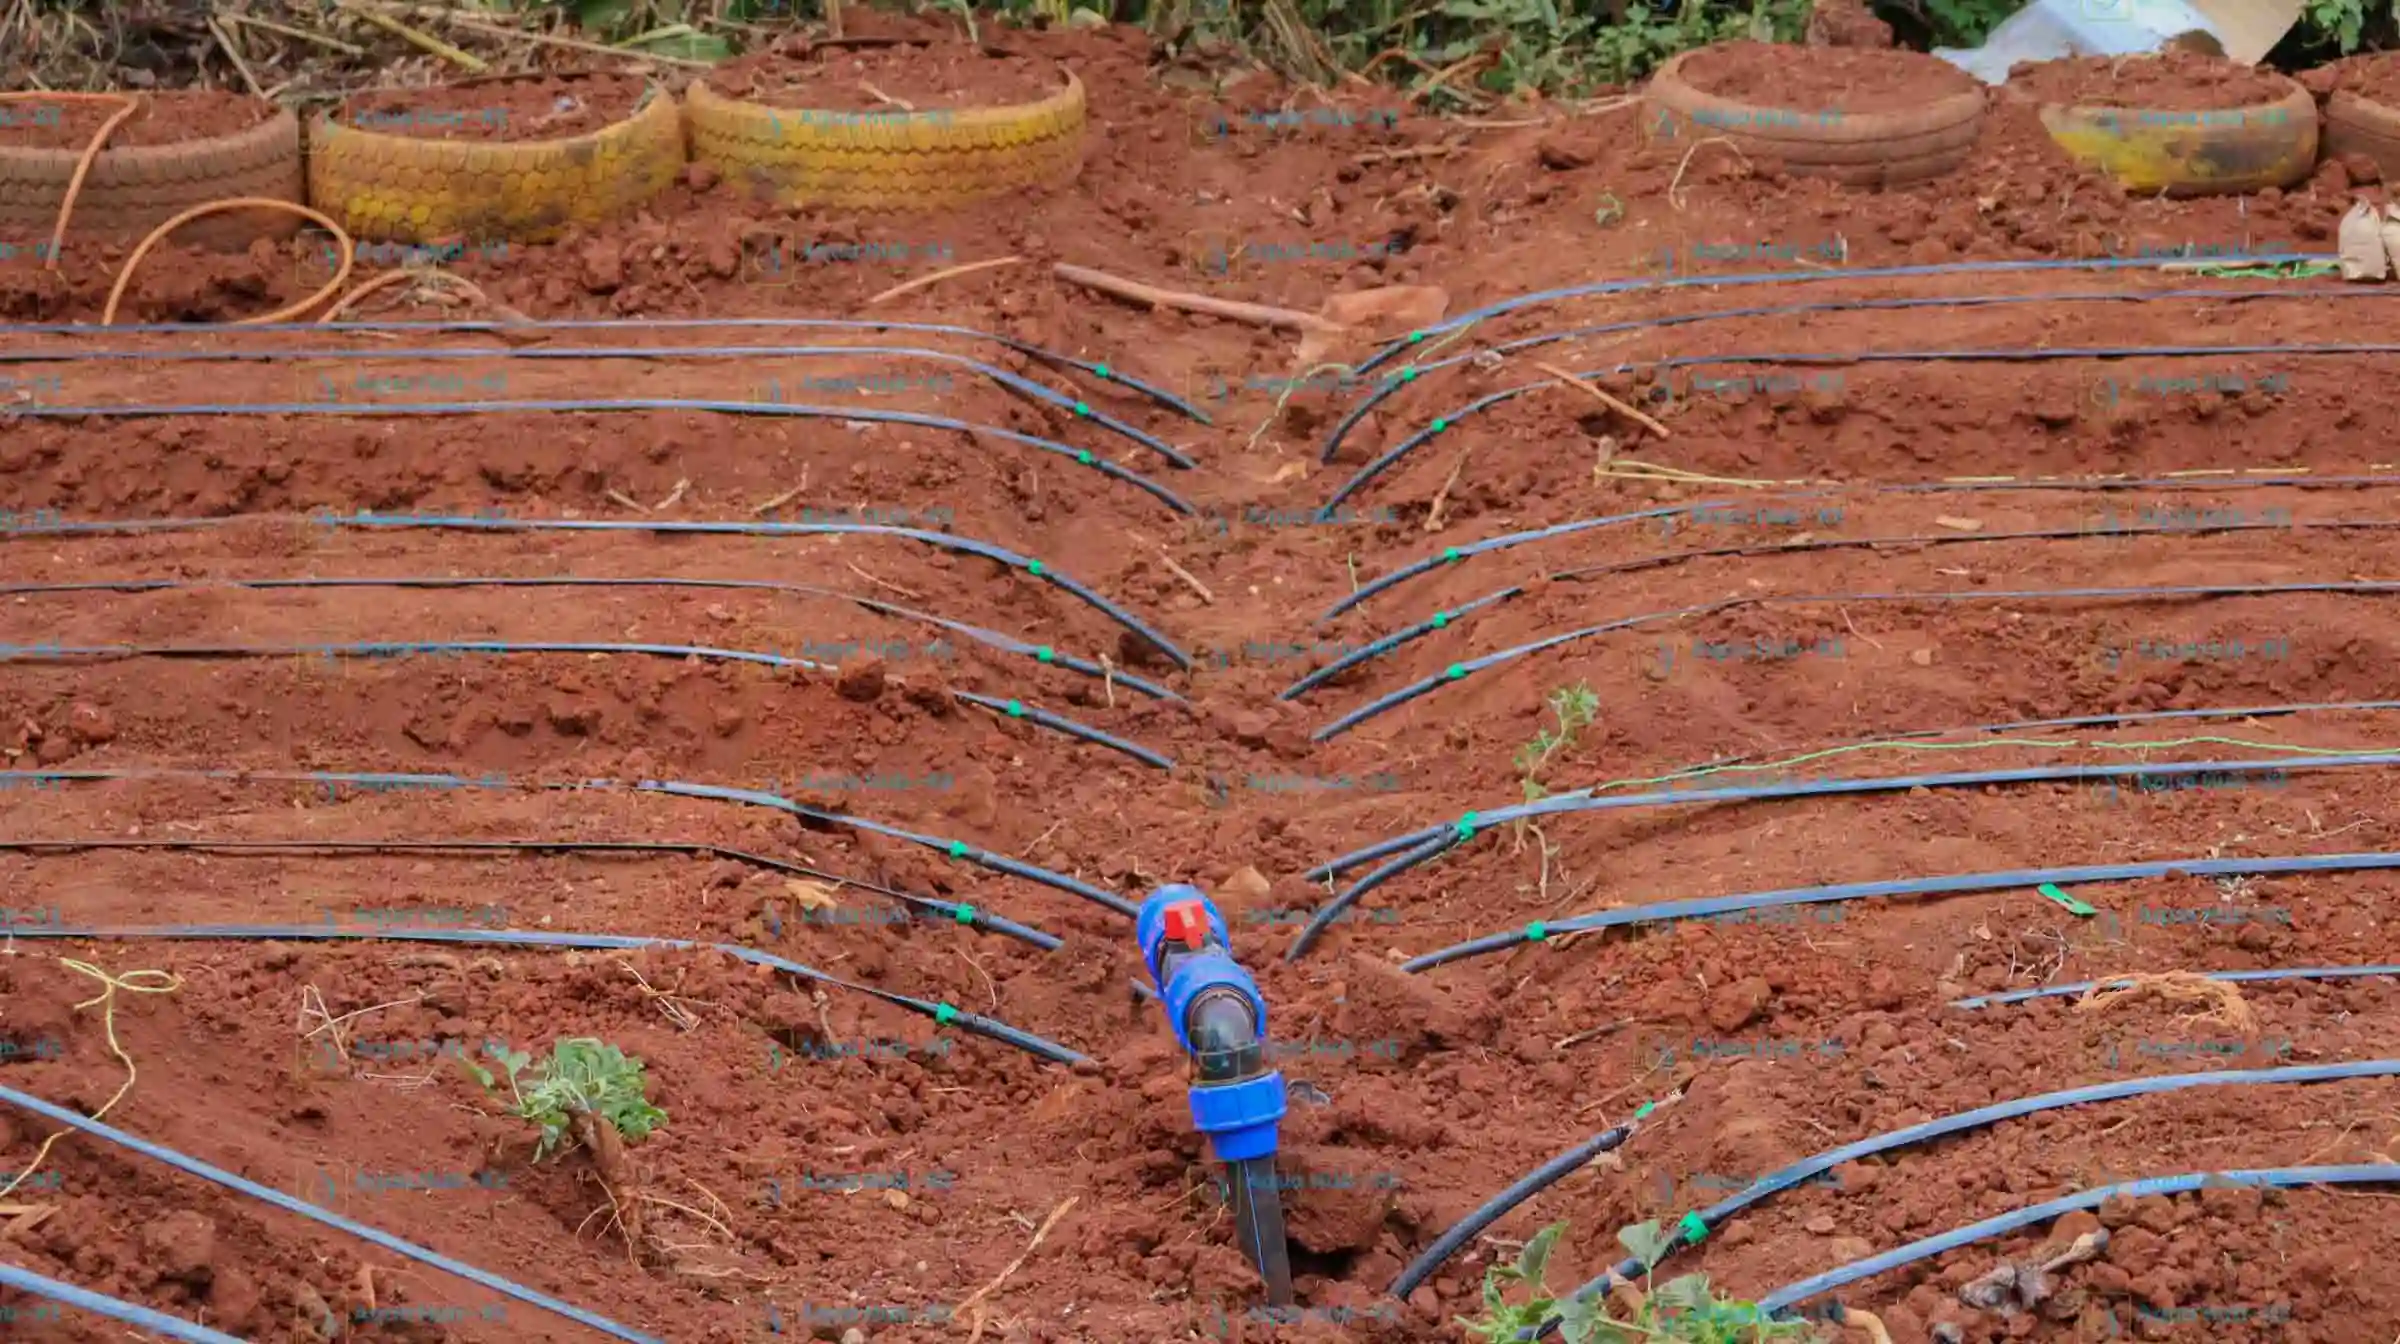
Step 1: Laying and Connecting Main and Sub-Main Lines
Lay the main line first, ideally slightly downhill from the water source to utilize gravity. Lay the pipe straight and connect sections using compression couplings or tees. Ensure the main filter unit and control valves are installed at the beginning of the system, close to the water source.
Step 2: Making the Lateral Drip Kit Connection
Once you lay the sub-main lines, mark the positions for your lateral drip tape. Use a special punch tool to make round holes in the sub-main. Insert the grommet into the hole and then firmly push the barbed side of the take-off connector into the grommet. Crucially, ensure the holes are on the top or side of the sub-main, not the bottom, to prevent sediment accumulation from cloggin the driplines.
Step 3: Flushing the system and Sealing the Driplines
The final step involves unrolling the drip tape along the crop rows and connecting it to the take-off connector. At the end of each row, seal the drip tape using an end plug. Before fully sealing the ends, open all closures and flush the entire system for a few minutes. This crucial step cleans out any debris left from the installation, preventing immediate clogging of the emitters. Only then can you secure the end caps and begin regular operation.
Maintenance and Troubleshooting of Drip Irrigation System.
High quality drip irrigation fittings are manufactured from UV resistant materials which last for more than 5 years. However, frequent maintenance is essential to prevent leakages and clogging.
Preventing Leaks: Proper Drip Fittings Installation
The main cause of water waste and pressure loss is poorly sealed drip fittings. To prevent troubleshooting leaky drip irrigation fittings, ensure that:
- Proper Insertion: Barbed fittings are pushed fully into the pipe.
- Tight Compression: Compression nuts are fully hand-tightened.
- Water Hammer Prevention: Install an air-release valve near the pump to prevent sudden pressure surges which can damage fittings. A reliable solution here is to open and close manual valves slowly, never abruptly, to manage pressure changes.
Flushing
Even with the best filter, minute particles will eventually accumulate. Regular flushing is the antidote. Schedule a flush once a month or immediately after fertigation. To flush, simply open the end plug and flushing valve at the end of each lateral line then let the water run until it is clear. Monitoring the pressure gauge before and after the filter is another great habit; a significant pressure difference indicates the filter requires immediate cleaning.
Sizing and Compatibility: Matching Pipe Diameter to Drip Fittings
Never attempt to force a fitting designed for one pipe size into another. HDPE pipe compatibility is measured precisely (e.g., 16mm, 20mm, 25mm).
Incorrect fitting will either leak immediately or create excessive friction that reduces the flow to the far end of the field. Always check the drip fittings specifications to ensure all components are uniform and rated for your specific pipe diameter and the expected operating pressure.
Frequently Asked Questions (FAQs)
1: What is the cost of drip irrigation fittings in Kenya for a half-acre in Kenya?
KES 5,000 to KES 10,000. Includes barbed couplers, tees, take-offs and end caps.
2: How to connect driplines to HDPE mainline?
use a punch tool to make a hole in the mainline, insert a barbed “starter” connector, and then attach the 16mm drip line to the connector
3: What size of take-off punch tool should I use for a 16mm drip tape?
For standard 16mm drip tape, you should use a take-off punch tool that creates a hole of approximately 10mm to 12mm in diameter. The hole must be slightly smaller than the grommet and take-off fitting to ensure a tight, watertight seal.
4: How much is a drip irrigation kit in Kenya?
Cost varies as per the farm size and driplines used. Between KES 140,000 to KES 180,000 per acre.
5: What is the purpose of the grommet in a drip kit connection?
Prevents leaks and make the connection to the take-off secure.
6: What is the ideal filter mesh size for drip irrigation systems?
The recommended screen filter mesh size is typically 120 to 150. This size is fine enough to filter particles that could clog the drippers.
7: Can I bury the drip tape and fittings to protect them from the sun?
For a subsurface irrigation layout, they can be buried but the driplines should be thick walled.
8: What are the best Pipe fittings for drip irrigation system?
Compression fittings offer reliable connection and can withstand high pressure.
9: How do I prevent water hammer after the solar pump shuts off?
To prevent water hammer prevention, install an Air Release Valve on the main line near the pump and at the high points of the system. These releases trapped air and prevented vacuum collapse when the pump stops.
10: Are there different drip tape wall thickness options?
Yes. drip tape wall thickness ranges from 0.2mm to 0.4mm.